Meal Prepping 101


Eliminate the stress and time of having to cook every single night by meal prepping!  It saves you time during the week and helps keep you on track with healthy eating!  Wether you are a student, you work full time or are a stay at home mom, it can be hard (I mean seriously impossible) to cook all of your meals at home every single day. This is where "Meal Prep" can quickly become your best friend! Without prepping your meals ahead of time you are most likely to eat junk food if you're too busy or on the go.
The amount of prep you do, depends on how much time you have to dedicate to prepping and your personal preferences.

I prep twice a week, Sundays and Wednesdays. I create a meal calendar depending on our schedule for the week and make a grocery list. I cut up all my fruits and veggies and precook all my meats (except fish and steak) and large meals like Meatloaf or Casseroles.
What the heck is Meal Prep??

It can mean different things to different people. For me it means cooking in bulk and creating grab and go snacks throughout my day. My most important prepped meal is lunch. I am a snacker and if I do not have a prepped ready to eat meal I will raid my pantry, fridge and pretty much munch on anything I can find. 
You may choose to prepare only lunches, grab and go snacks or all of your meals if you have the time. 
Chances are it will be a little bit of trial and error to get settled into a routine that suits your lifestyle and preferences. 
If you always find yourself rushing in the morning and your breakfast consists of a cup of coffee and a pop tart then prepping breakfast will help you. Or if you work late hours and have a difficult time cooking dinner on a nightly basis then maybe Dinner is where you start. 
There is no right or wrong. 


3 Days of Lunch
Before you Start

The first thing you need to do is invest in some good quality containers - these can be tupperware or glassware. Make sure they are microwave/oven safe and BPA free if you choose plastic. Also getting the same size containers will help you stack them and prevent having to play fridge Tetris. 
I prefer glass containers myself for large quantities and also have special 3 compartment containers for lunch that make it easy to separate and take on the go. 


Planning

The first thing you need to do is PLAN.

If you have never meal prepped before it is so easy to become overwhelmed!  Cooking for an entire week is a pretty big job and even the best of us can struggle with that. My best advice is to take it slow and sticking to a few days at a time to help you get you used to the process. Take a look at your weekly family schedule and plan a food calendar around it. 
I like to start with my proteins and create several meals around them. 
Chicken Breast for instance can be used for so many different meals and leftovers can be recycled into lunch the next day. Salads, Stir-fry, Tacos, Breakfast Omelets.. Oh the possibilities. 
As I mentioned before I like to prep on 2 different days. One of the reasons why I do this is because I don't want to have food spoil. So also keep in mind longevity in the fridge. Fish for instance I cook the day of so it is fresh, but Overnight Oats will stay good for a few days. 


Prepping

Grocery shop for the week. 
I love going to Farmers Market on the weekend and save on fresh produce. 

Now, how you choose to prep your meals is up to you. 

You can:1. Cook enough protein, veggies, starches to eat for the week 
(keeping these items basic will make them more versatile to use during the week)
This way you will get larger quantities of food and can put together meals everyday. 
OR
2.Cook several meals to generate enough to alternate for the week (five/six days of dinners) 
This way you will have pre packaged individual meals. 
OR
3. Cook your meals throughout the week based on your schedule and prep your breakfast and lunch the day before. If you know you will have time on Monday to cook dinner but not Tuesday then cook Monday and prep for Tuesday as well.  


Cooking 


1. Cut and Prep Fruits and Veggies (I do this while my protein is cooking) 
2. Cook as much of your protein that you would like to have for the week

  • Grill chicken in bulk with a variety of seasonings to switch up the flavor during the week
  • Use your crockpot!  Probably my favorite way or food prep. Meatballs or shredded chicken is a breeze. 
  • Hard boil enough eggs for the week for a grab and go breakfast snack. 
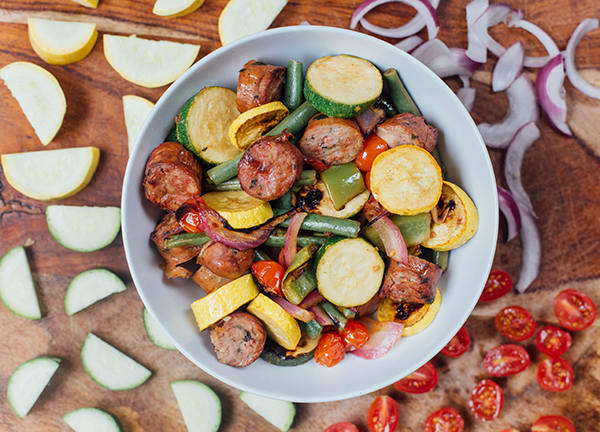
  • Roasting or grilling veggies in bulk.

3. Snacks- Separate in baggies and labeling them works best for me. 
My boyfriend goes to work when I stay home so I pre-pack his lunch and snacks the evening before and keep in a lunch bag in the fridge so he can just take it with him when he leaves at 6 am. (I am not awake enough to do it then) 4. Don't forget your Freezer! Pre-packing crock pot meals that you can freeze until you need it during the week is a life saver. Imagine having everything you need in a bag that you can just put in a crock pot when you go to work and have a delicious meal when you get home. 


Remember, do what works best for you!!!!

If cooking everything at once on Sunday is too much because that's your day to spend time with family, then divide your prep to two days, its what I do! 
I had to start somewhere and a little bit of meal prep is still better than none at all. Even if that is just chopping up a few veggies or grouping things in containers, you will feel so much better about cooking your food if you have it organized ready to go!


California Chicken Salad


Do you ever just have these cravings and you can't quite figure out how to satisfy it? You pretty much start eating everything in your fridge, your pantry, your snack drawer and then you are so stuffed but still have a hankering for something.


I felt like that recently and actually it was during Hurricane Matthew so we were working with a lot of food in the house since I stocked up on all my necessities.       
No worries the Hurricane did hit florida but central florida was lucky and we only had some rough winds and heavy rains for a few hours. 

Anyways, I decided to food prep the day before to make sure we had meals we could eat cold incase we lost power. One of the things I made was plain shredded chicken in the crock pot. I figured this could be eaten cold with a salad or turned into chicken salad with the help of some mayo and other items I had in the fridge.   


That is how this delicious Salad was born. I was on an epic eating rampage and decided to make this salad which helped quench my craving and save the day.                                         
The funny thing is that there was this meme going around and it described my mood perfectly. It was almost like my brain was in survival mode telling me that I had to eat because there is a chance that won't happen again if this Hurricane hit. I clearly don't have a survivalist brain because rationing would make more sense instead of gorging myself with all the food in my house.  So this salad came to be because lately I have been on a grape kick. I think I have been purchasing 2lbs of red grapes a week. This seemed to have started when I stopped drinking wine. I figure grapes are healthier. So all my fruit servings of the day are grapes. Frozen or cold doesn't matter. I also had this shredded chicken. Mayo and I am a really big spice and herb advocate. I believe in "the more the merrier" when it comes to seasoning food. There is just something about flavoring plain food and changing the taste just by adding some guilt free items like rosemary or tarragon.  So with just a few ingredients I made my new favorite lunch snack. Its simple to make and I hope you guys enjoy it as much as I did. It really only lasted that one day and all 4 helpings of it were amazing. 


California Chicken Salad
aka "Hurricane Matthew Salad"

4 cups shredded cooked chicken (this was about 3 breasts)
1 cup walnuts, toasted and chopped

1 cup chopped celery (optional)
2 cups halved seedless red grapes
3/4 cup Olive Oil Organic Mayonnaise
2 tablespoons Apple Cider Vinegar
2 tablespoons finely chopped Tarragon
1/2 teaspoon salt
1/2 teaspoon black pepper


Directions are simple... Combine in bowl and refrigerate until ready to serve. 
Which in my case was immediately. 
I have to say however, the second and third serving were amazing after all the flavors came together while they were chilling (haha) in the fridge for a few hours. 


Core De Force - Marital Arts Program

AHHH New Workout!! 

Listen I am not really one to get excited over a workout program... Okay thats a bit of a lie, I get giddy every time something new comes out for me to try, BUT this is totally different than anything Beachbody has ever done.  This Program is based on MMA training !!! I have actually taken real MMA classes before and that stuff is NO JOKE! I had my butt handed to me by a 12 year old boy who was half the size I was. 
This is going to be amazing and I am excited to tell you more about it!


CORE DE FORCE is the first program from Super Trainers Joel Freeman and Jericho McMatthews. 
Here’s how it works: each workout is broken into 3-minute “rounds” — just like a real boxing match. In those 3 minutes you’ll alternate between addictive Boxing, Kickboxing, and Muay Thai-inspired combinations, bodyweight training, and cardio spikes that kick your fat burn into overdrive. But all that punching and kicking doesn’t just burn calories. Each move, whether it’s a jab or a knee, is rotational, giving you a 360-degree core workout that will tighten up your entire midsection. All you have to do is hit it hard 3 minutes at a time and before you know it — you’re done!
This program is for anyone who wants to lose the belly — whether you’re a beginner or you’re more advanced. There’s even a modifier in every workout and move breakdowns to help you master your hooks and kicks from the get-go.


CORE DE FORCE includes 4 MMA-style workouts, 2 bodyweight workouts, 2 core workouts, 1 active recovery workout, 1 quick before-bed stretch routine, a quick-start guide, a 30-day calendar, and an eating plan.  
This is going to be available late November so just in time to shed some of those Holiday lbs that I will be putting on! 

Im not myself when I am Hungry


Most days its great being an adult, but ever so often I wish I was a child and someone stood behind me mouthing "she's just hungry" when I am not in a fantastic mood. 
There is this strange phenomena that seems to occur when I am overdue for a meal.. its called getting HANGRY which is an amalgam of hungry and angry. I seem to get short tempered, moody and just outright grumpy. 
There are several other moods that my boyfriend has so eloquently named HANKY and HOODY.  
Let me explain..... 


So HANGRY is when anything and everything is irritating. It really doesn't matter who or what it is I am just irritated about it.. I would say this is the worst mood out of all three. This one pretty much is code red for -Get this girl fed STAT- 
HANKY is hungry and cranky. This particular mood is not so bad, well its not good, but its not Code Red. This one is when I stop caring and walk around with a look on my face that says don't talk to me. If you ask me a question I will most likely answer with "I don't care" and nothing anyone does will be pleasing me. 
HOODY, if you've caught on, is hungry and moody. If want to put these in order, this is the least threatening of the 3. I just am listless and quiet and don't have much to say which according to Pat this is a welcoming mood every once in a while.  Its still not a pleasant mood because I am pretty much useless when it comes to decision making and have this cloud of sadness following me around. If you imagine a sad lonely puppy sitting in the rain looking at you with those big sad eyes- yeah thats me when I am HOODY. 

Us HANGRY people never mean what we say or do, but it still doesn't count as a valid excuse to be a raging cranky pants.  You can accessorize and advertise your hunger issues with shirts, pillows and even necklaces which can serve as a fair warning to those poor schmucks caught in our cross hairs. 


If you're not sure wether or not you fall into any of these aforementioned categories there are some telltale signs that you are one of us. 
Have you ever felt perfectly fine one moment and then instantly been catapulted to the hunger pit of doom??  At that point its on and you need a meal.

Ever sat down on the floor next to the fridge and eaten cold mashed potatoes out of the container with your hands? Locate all the snack food in your house, eat it all, have a 20 minute sugar high and regret it for the rest of the day?? You're so hungry the only thing that can possibly satisfy you is potatoes topped with pasta topped with rice smothered in butter?? Once you finally get food, there’s never enough time to eat it. You’ve got to get it in your face and people wonder if you've either been in prison or starved your entire life??  You are definitely a HANGRY person.


So why does this happen?? How come we get in strange moods from lack of food? 

Well it has to do with carbohydrates, proteins and fats in everything you eat. The nutrients mainly glucose(sugars) from these foods pass into your bloodstream and are used for energy.  
You might be asking yourself (like I did) I don't feel tired when I am HANGRY.... Let me explain further.
So pretty much when you start to run out of these nutrients circulating in your blood stream your brain goes into "life-threatening" panic mode. Your brain needs glucose to do its job and if you don't have any its not happy.  Your brain might be a small part of your body but it used up to 30% of your energy to work. 

When you're hungry and do not have enough sugar hanging around to make your brain happy it becomes more difficult to focus, concentrate and pretty much be nice to people. Once that panic mode sets in your body is also going to be releasing adrenaline into your bloodstream which could cause some of those "unexplainable" outbursts of anger. 

HMMMM makes more sense now doesn't it?  

There you have it folks... You're not yourself when you're hungry because your brain needs energy and turns you into a psychopath until you feed it. 


Dairy Free Milk ??


Milk alternatives aren’t just for vegans — although the explosion of options beyond just
almond and soy in recent years are an answered prayer for animal-free foodies.
So as you all know by now I am allergic to all things dairy. What a bummer right? Well its not so bad because there are actually ALOT of alternatives out there that are believe it or not.. HEALTHIER. 
I am not saying they are all healthy, just like with everything else I always suggest reading the ingredient label. Ingredients can be organic or genetically modified, natural or heavily processed, the fewer ingredients in the list and the more you recognize and can pronounce, the better. 

Milk (unless you're getting skim) contains cholesterol and skim milk is higher in lactose (sugar) than whole milk. There is no real health option when it comes to choosing dairy-based milk. All plants are free from cholesterol, and the body produces enough on its own so that we don’t need to take in excess cholesterol to maintain good health.

Honestly guys we don't even buy dairy milk anymore. Non-dairy milk works the same for us and we use it the same way you would cow's milk. Cereal, oatmeal, sauces, baking, soups, Shakeology and even ice cream. It taste pretty good on its own if you're a glass of milk in the morning kind of person.


Here is a list of some of the top Milk Alternatives 

Almond
30 calories, 2.5 g fat, 180 mg sodium, 2 g carbs, 0 g sugar, 1 g fiber, 1 g protein, 45% DV calcium (based on Almond Breeze)
Soy
80 calories, 4 g fat, 70 mg sodium, 3 g carbs, 1 g sugar, 2 g fiber, 7 g protein, 30% DV calcium (based on Silk)
Bonus: Soy is the only plant-based milk with protein content similar to dairy milk so it will be great in a post workout shake. 
Cashew
40 calories, 3 g fat, 120 mg sodium, 3 g carbs, 0 g sugar, 0 g fiber, 1 g protein, 30% DV calcium (based on Cashew Dream)
Hemp
80 calories, 8 g fat, 125 mg sodium, 1 g carbs, 0 g sugar, 0 g fiber, 2 g protein, 30% DV calcium (based on Living Harvest)
Flax
25 calories, 2.5 g fat, 80 g sodium, 1 g carbs, 0 g sugar, 0 g fiber, 0 g protein, 30% DV calcium (based on Good Karma)
Bonus:  Hemp and flax milk are rich in omega-3s, so they get bonus points for extra health benefits.
Coconut
45 calories, 4g fat, 0 mg sodium, 2 g carbs, 0 g sugar, 1 g fiber, 0 g protein, 10% DV calcium (based on SO Delicious)
Bonus: Coconut milk is high in fat so it’s a great alternative to cream in your coffee 
Rice
120 calories, 2.5 g fat, 100 mg sodium, 23 g carbs, 1 g sugar, 0 g fiber, 1 g protein, 2% DV calcium (based on Rice Dreams)
Bonus: Rice milk is good for people with both dairy and nut allergies, but keep in mind it’s high in carbohydrates, so pair it with protein-rich foods to keep your blood sugar stable.
Hazelnut
110 calories, 3.5 g fat, 120 g sodium, 19 g carbs, 2 g protein, 1 g fiber, 14 g sugar, 30% DV calcium (based on Pacific)
There are also several flavored non-dairy milks on the market and I would be doing you guys an injustice if I did not tell you about Nutchello <3 

There are 3 varieties, a dark chocolate walnut , toasted coconut+cashew and my favorite 
Caramel Almond+Cashew 
70 calories, 2 g fat, 190 mg sodium, 11 g protein, 0 fiber, 30% DV calcium
I add this into my shakes to switch it up, I also add it to my Ice Cream recipe( below) and it is delicious with Chai Tea. Pretty much anything really..  If you have tried this and have an awesome recipe idea please share it with me because at this point I purchase this in bulk.  


I mentioned Ice Cream Earlier so I wanted to give you guys my favorite FAVORITE recipe in the world !!  


This is the bees knees !!! It is so easy to make and so delicious. This is my goto recipe when I get in a sweet dessert mood. I pretty much always have bananas in the house and I don't eat them once they get brown spots on them.. So when they are more brown than yellow I just peel them and freeze them. 
I also freeze ice cube trays with almond milk which makes it really convenient for this recipe and my morning Shakeology.  I do not drink coffee but I think it would be pretty brilliant for Iced Coffee (I might be on to something) 

Ok back to the Ice Cream.  Here is a recipe from Beachbody.com that is pretty much spot on. This can be altered... basically you do not have to use Shakeology in this recipe at all if you don't want to, or if you do not have any.  Also you can leave out the Peanut butter if you're not in the mood.  So you will be left with Frozen Bananas and a milk of your choice :) Still yummy any which way you decide to make it.   


Prep time
Total time
Author: 
Recipe type: Dessert
Serves: 5 servings, about ½ cup each
Ingredients
  • 1 cup any kind of milk (I prefer Vanilla Almond Milk, or Caramel Nutchello)
  • 2 scoops Shakeology
  • 2 medium frozen bananas (cut into chunks before freezing)
  • 2 Tbsp. all-natural smooth peanut butter
Instructions
  1. Place milk, Shakeology, bananas, and peanut butter in high-powered blender (such as a Vita-Mix); cover.
  2. Blend on low for 5 seconds; increase power to high and continue blending for 30 seconds until smooth.
  3. Pour mixture in a large glass bowl; cover.
  4. Freeze for 4 hours, stirring every 30 minutes, before serving.
If you do not want to wait 4 hours before eating this delicious treat I would suggest using frozen milk or adding Ice cubes to give it more substance. 
Enjoy :) 


Broccoli Tots


I recently posted some of my meal prepping on Facebook and the Broccoli Tots I made received the most attention so I figured I would share the recipe. 
These were so delicious. I changed them up a little because I did not add any cheese and used regular Gluten Free breadcrumbs instead of Panko but Oh my gosh they were yummy. 
My boyfriend is a Broccoli-aholic. He would be happy eating chicken, rice and broccoli for dinner every single day. Me on the other hand, not so much.  Its not that I don't like it, but it isn't in my top 10 favorite vegetables. 
I love Tater Tots however and with my food allergies it is impossible for me to find frozen/ pre-done ones and honestly I don't really want to make them from scratch.  
So when I saw this recipe online I was thinking that WHOA they combined one of my favorites with Pats .. match made in heaven? Actually yes ! As previously mentioned they were A-M-A-Z-I-N-G and super easy to make. 

To make these delicious Tots the broccoli has to be steamed or boiled. Once tender (and cool enough to touch) chop into small pieces and in a bowl mix with egg, breadcrumbs, seasonings, and cheese. I added some Hot Sauce and Chili powder to give it a kick. 

It helps to refrigerate the mixture briefly (15–30 minutes) to help it firm up and make the shaping process easier. To form your tots, use your hands to shape the mixture into a tot-like form. Then, place them on a baking sheet and bake until golden brown. Tip: make sure you use non-stick sheets or foil .. I didn't and it was a bit of a pain to flip them

Enjoy :) 


Prep time
Cook time
Total time
Author: 
Recipe type: Lunch/Dinner
Serves: 8 servings, 2 tots each
Ingredients
  • Nonstick cooking spray
  • Hot water
  • 12 oz. broccoli florets (about 5 cups)
  • 1 large egg, lightly beaten
  • ⅔ cup whole grain Panko bread crumbs
  • 2 cloves garlic, finely chopped
  • ¼ cup finely chopped green onions
  • ⅔ cup shredded cheddar cheese
  • ¼ tsp. sea salt (or Himalayan salt)
  • ¼ tsp. ground black pepper
  • 2 tsp. hot pepper sauce (optional)
Instructions
  1. Lightly coat a large baking sheet with spray. Set aside.
  2. Boil water in steamer or large saucepan over high heat. Reduce heat to medium-high. Place broccoli in steamer basket; cook for 3 to 4 minutes, or until tender-crisp and bright green. Drain and chop.
  3. Preheat oven to 400º F.
  4. Combine broccoli, egg, bread crumbs, garlic, green onions, cheese, salt, pepper, and hot sauce (if desired) in a large bowl; mix well.
  5. Refrigerate, covered, for 15 to 30 minutes.
  6. To make each tot, shape approximately 2 to 3 Tbsp. broccoli mixture into tot shape. Place on prepared baking sheet.
  7. Bake for 8 to 10 minutes. Turn over; bake for an additional 7 to 8 minutes, or until golden brown.


Chicken Cacciatore

There is nothing better than a wholesome meal ! This Dish is full of old Italian flavors and  combines lean chicken breast with eight different types of vegetables. 
My mom has always been an amazing cook and seasoning and flavoring is something she prides herself in. There has never been a time that I can remember that I needed to salt or season my food. This dish reminds me of my mom because it truly is full of flavor that will have you going back for seconds and thirds.  
I served this with steamed potatoes since I had some yellow containers left to eat <3 

Chicken Cacciatore

Total Time: 31 min.
Prep Time: 10 min.
Cooking Time: 21 min.
Yield: 4 servings
Ingredients:
1 Tbsp. olive oil
1 lb. raw chicken breasts, boneless, skinless, cut into 1-inch pieces
1 medium onion, thinly sliced
1 medium celery stalk, sliced
1 clove garlic, finely chopped
1 medium red bell pepper, cut into 1-inch pieces
8 oz. sliced mushrooms
1 (14.5 oz.) can whole tomatoes
1½ tsp. dried basil, crushed
Ground black pepper (to taste; optional)
2 medium zucchini, sliced
1 medium eggplant, peeled, cut into 1-inch cubes
6 fresh parsley sprigs, finely chopped (for garnish, optional)
Preparation:
1. Heat oil in large nonstick skillet over medium high heat.
2. Add chicken; cook, stirring frequently, for 3 to 4 minutes, or until lightly browned.
3. Add onion, celery, garlic, bell pepper, and mushrooms. Cook, stirring occasionally, for 4 to 5 minutes or until onion begins to soften.
4. Add tomatoes, basil, and pepper; cook, stirring occasionally, for 5 to 6 minutes.
5. Add zucchini and eggplant; cook, stirring occasionally, for 5 to 6 minutes, or until chicken is no longer pink in the middle, and juices run clear.
6. Garnish with parsley if desired.
Tip: Chicken Cacciatore can be served over brown rice or whole wheat pasta.
Calories in Chicken Cacciatore | BeachbodyBlog.com
Find more recipes like this on Beachbody.com

Cooking Terms for the Domestically Challenged

I was very fortunate enough to grow up in a home where I was forced to help my mom in the kitchen. I used to complain and huff and puff because at that point in my life (age 5-12) I had no idea how important cooking would be to my health and life. 
Having food allergies means that most of my food needs to be prepared by me and since I want it to taste good having knowledge of basic ingredients and cooking terms is pretty important. 

I do have a lot of friends that did not grow up in a cooking household. My boyfriend for instance is not a cook and neither is his mom. Her philosophy is that cooking and cleaning after a meal should not be twice as long as the meal itself. That does make sense but I enjoy cooking so much the eating part is only half the fun for me. Plus my boyfriend and I have an agreement that I do the cooking and he does the cleaning (Win !) 
So even if you do not cook often or well, its important to have a basic grasp of cooking terms so your hard work in the kitchen doesn’t go to waste. Not knowing the meaning of a word can lead to a lousy-tasting meal or an upset stomach.
Here’s our handy guide to some common — and sometimes confusing — cooking terms, so you can win at adult-ing.

IN THE OVEN

Bake — Cook in the oven at mid-temperature (usually between 300 and 375 degrees).
Roast — Cook in the oven at a higher temperature (usually 400 to 475 degrees) for a shorter amount of time. “This can also contribute browning, which adds to the flavor of the dish,” Caterson says.
Broil — Cook at a high temperature with your food close to the oven’s heat source. On bad-weather days, this can be a passable substitute for grilling; Caterson notes that broilers are basically “upside-down grills.”
ON THE STOVE
Sauté — Cook in a pan over medium-high heat, using minimal fat, while continuously stirring and flipping with a spatula. “As you get better, you can ditch the spatula and flip the food by just shaking the pan,” Caterson says. “You literally want to make the food ‘jump’ so it cooks quickly and evenly.”
Brown — Add food to a preheated pan and let it sit until it turns brown on one side, then flip it over. “This technique will add incredible flavor,” Caterson says.
Braise — After browning a piece of meat, add broth or water to the pan and simmer until the meat is tender. On a budget? This method is great for tough cuts of meat.

IN HOT WATER

Boil — Heat a liquid to its max temperature. You’ll see big, rolling bubbles and steam.
Parboil — Dunk food briefly in boiling water to cook it partially. (If you follow this up with a dunk in cold water to stop the cooking process, it’s called blanching.)
Simmer — Cook food just below its boiling point. Look for itty-bitty bubbles drifting up from the bottom.

CUT IT UP

Chop — Cut into rough, randomly-shaped pieces. No need for uniformity here.
Dice — Cut into small (1/4″ to 1/2″), square, uniform pieces.
Mince — Cut into the smallest pieces possible.
Slice — Cut into lengthwise strips. (On that note, julienne means to slice veggies into uniform matchstick shapes; chiffonade means to slice herbs like basil into ragged strips.)
Shred — Cut into short, narrow strips using the bigger holes in a box grater.
Grate — Cut into tiny, powdery pieces using the smaller holes on a box grater.

MIX IT UP
Blend —Stir ingredients until they’re evenly combined.
Beat — A more vigorous stir, usually with a whisk or electric mixer, until the mixture is smooth. This introduces air, which can affect the texture of baked goods, so don’t take shortcuts with an electric mixer if the recipe says to blend by hand.
Fold in — Use a spoon or rubber spatula to slowly add a light ingredient or mixture (like powdered sugar or whipped cream) into a heavier mixture (like batter) by gently scooping the heavier batter over the lighter mixture until it’s absorbed. This keeps air bubbles from sneaking into the mix.
Whip — Blend at high speed to get air into the mixture, like you would when making whipped cream or meringue.

THE SMALL STUFF
Dash — A quick shake of your spice jar.
Pinch — Literally whatever fits between your thumb and forefinger. “Reach in your salt or spice container and pick up a pinch,” Caterson says.
Dollop — A spoonful. Big spoon or small spoon? Depends on how much you like the ingredient.
Find more recipes like this on Beachbody.com
Following recipes on your phone, tablet, or laptop in the kitchen is great, but watching someone create Beachbody-approved recipes can be even more helpful to budding home cooks. Now, with FIXATE, only on Beachbody On Demand, you don’t have to be a master chef to add flare and elegance to your healthy eating plan. Autumn Calabrese and her brother, international chef Bobby Calabrese, show you exactly how to create tempting and delicious meals that can still help you lose weight. You’ll get access to the detailed recipes and grocery lists, and get new recipes each week!

Follow @ Instagram

Back to Top